Tuesday, November 10, 2015

Mermaid Party Inspiration!

Excited to share this pretty party with you today! Beautiful 10 year old, Lacie, had one magical party!  Her sweet and talented, mama, Jeanette, created this gorgeous party for her at Sea Life Aquarium at Great Lakes Crossing and was kind enough to share the photos with us. We are so glad she did!


Happy Birthday, beautiful girl! Sending you hugs and kisses and a big wish that all your birthday dreams come true! XOXO, Jen

Party Details:

Location:  Sea Life Aquarium
Cookies:  Sugar Me Desserterie
Edible Cupcake Toppers:  Lena's Cakes
Mermaid Tutu: Tulle & Hook
Paper Birthday Banners: Glitter Mama
Jellyfish Ornaments: By The Seashore Decor
Tulle Pom Pom Wands: Pretti Mini
Fabric Backdrop:  Pretti Mini


Wednesday, September 30, 2015

10 Easy Ideas For A Rustic Country Chic Wedding

   I had the great honor of styling my cousin's wedding last weekend in Lancaster, PA. The bar and property were incredible, the company warm and laid back, the weather perfect. 
This beautiful couple wanted a casual, relaxed feel that would be cozy yet fun for their guests. The whole affair was very laid back with a bonfire late night, s'mores kits for all, and camping in tents for all that wanted to stay over. I loved all of their "out of the box" ideas! 

10 EASY IDEAS FOR A RUSTIC COUNTRY CHIC WEDDING:
1. Hanging decorations. Whether you hang flowers, paper flowers, vines, ornaments or pom poms (as we did here) take advantage of the height found in rustic barns or tall country spaces. If outside, hang some whimsy from the trees or inside a large tent. 
2. Hay bale seating. A cozy hay bale couch screams "shabby chic" and is also an easy way to create. It gives you extra seating and adds a simple, relaxed elegance to your wedding at the same time. Throw a sheet, blanket, or table cloth over them and add throw pillows.
3. Tea Staining. If you can't get your hands on vintage lace (or only have white like I did), tea staining is the way to go to add those beautiful cream or champagne colors to your lace or linens. Boil a big pot of water, add in 8-10 black tea bags. Reduce to low and throw in any lace, sheet, or fabric you'd like to darken. Check it every few minutes to check the color. About 5-10 minutes will stain it to a nice ivory. 15 -30 minutes will deepen in to cream, ecru, or champagne. Results depend on the age and type of fabric, but those estimates should get you pretty close.
4. Hang a backdrop. We used ribbon and lace to create a large backdrop to block off one section of the barn, and another smaller version for the photo booth below.
5. The Photo Booth. We picked up these cute paint-yourself wooden photo props at Joann's, but you can also find a lot of printable versions on line.
6. Mason jars. You can use them for anything from beverage holders to flower vases to holding napkins and utensils. Here, the bride made her own box to hold them. She left out metallic markers for everyone to design their own glass. Tie burlap, ribbon, or lace on them for a special touch.
7. Old Picture Frames.  Adorable for photos, photo booths or hanging decorations. 
8. Chalkboard paint milk jugs instead of vases. Gorgeous plain or personalized. I found these at efavormart.com 

9. Tutus instead of brides made dresses. Since this wedding was so casual, some of the kids wore leggings and cowboy boots, but you can easily dress it up, too, as the daughter of the groom did.

10. Consider a bouquet you can keep. A fun new trend is the keepsake bouquet. We made this one from vintage and tea stained lace, cream tulle and ivory glitter tulle. 

More inspiration and Shopping Information:


DIY Photo Wooden Photo Props - www.joann.com
Black Chalk Painted Milk Jugs - www.efavormart.com
Mason Jars - www.michaels.com
Keepsake Lace Bouquet - Prett Mini
Lace and Tulle Pom Poms - Pretti Mini
Child's Tutu & Baby Tutu Dress - Pretti Mini
Backdrop - Pretti Mini


Wednesday, August 19, 2015

Tea For Two (Grandma Time!)

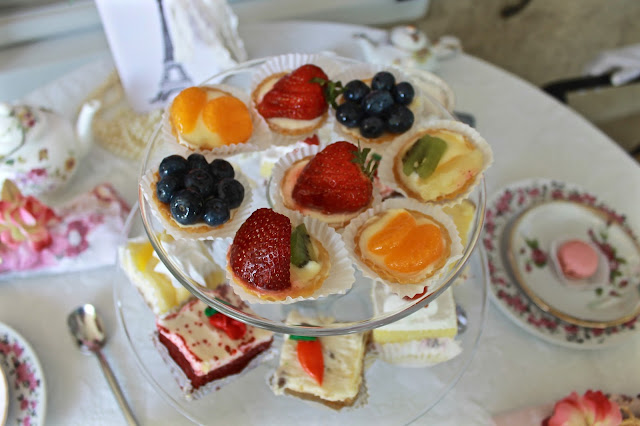
My mom has been saying all summer she would love to do a Grandmother and Granddaughter tea with my daughter, Ruby.  So yesterday she came down for a visit and I set them up a little party on the porch. It was so SWEET! Ruby could hardly sleep the night before, knowing Grandma was coming for a visit! It was so cute. She was up early, bathed, dressed, and sitting on the porch waiting for her an hour before her arrival. Love how these pics captured their special time together!
Ruby searched the house till she found a pair of pink gloves and a hat for my mom to wear. 
Grandma happily obliged and a fancy tea for 2 lovely people began!
 Even though the roses are faux, Grandma played along when Ruby suggested they "smell the roses".
Love this pic. My mother looks so happy and peaceful here (...while Ruby tries to sneak a pastry!)
One happy little girl!
Ruby asked me to make up a special set of pink poms and pink roses for the occasion.
Mom brought a big pink box filled with yummy treats from her favorite local bakery. YUM! I couldn't resist grabbing a couple of these scrumptious treats before they went out and made myself a cup of tea to go with it! I watched through the window at their lively conversation - just dying to know what they were talking about - but stayed inside to let the two have special time together.
I did, however, manage to get a couple cute pics though the window...

...that is, until I got CAUGHT!!! LOL!

Such a great visit with my mom and the best day ever for my daughter!

Hoping you and your family are savoring the rest of these wonderful summer days!

xoxo,

Jen


Tuesday, August 4, 2015

Adorable First Birthday Photo Shoot

Some days you get a group of pictures from a customer that just makes your day. These adorable shots did that for me! Sweet Sarina couldn't be cuter in her first birthday shoot! These gorgeous shots were taken by Juls Megill. A lot of items were purchased from local Etsy Artisans (which I love) including my own Pretti Mini. See full list of credits and links at the bottom of this post.


So precious! Huge thanks goes out to Sarina's family for sharing! 


Credits: 

Cake: Whole Foods
Headband & Barefoot Sandals: Sweet Chubby Cheeks
Sequined Number 1: Willow Lane Shoppe
Backdrop, Banner, and Poms from my shop, Pretti Mini

Monday, June 15, 2015

Swing Set Make-Over: Summer DIY Project!

Reposting this DIY Project I did last summer. It's one of my most popular pins on Pinterest so I thought it was worth a repost!

 
So excited to share a little project I did this summer! We got a used swing set off someone on Craigslist. A great find and in good shape, but needed "prettied up" in my opinion. So off I went to Joann Fabrics for some fun, outdoor fabric. LOVE LOVE LOVE the bright pattern I found! Our backyard colors (on chairs, cushions, and accessories) are orange and green so this went very well with the rest of the decor, yet stood out as something special for a girlie clubhouse. :-)

I got about 4 yards of the fabric and if you keep an eye out, you can almost always find JoAnn coupons for 50% off. I used mine and only spent about $40.00. I also got 1 yard of a coordinating fabric to throw into the mix. You'll need to get some heavy duty thread to do the project, too.
First thing you want to do is lay out the old tarp that comes with it. Measure each piece and then add an inch to each side - allowing for the hem. Then cut and hem your fabric.
For the back panel, I wanted it to be double sided. This way it is pretty on the inside and outside. So I just measured out another piece the same size, hemmed it, and sewed the 2 pieces together.
Now you are ready to hang! Using the same holes and screws that came with the swing set, my husband and I drilled/screwed in the new fabric. It's been holding up great so far, but I think I may unscrew and take it down in the winter to keep it looking fresh and just put it back up next Spring. Only takes about 10 minutes to attach everything.
Made easy curtains with a rope and 2 square panels of fabric. Just hem fabric all the way around and then hem again on top, leaving enough room to fish the rope through. Then hang!
  I made a bunting banner to go across the top of the swing area to tie it in with the club house side. It's sewn on a thin rope and tacked on the wood beam.

My daughter and her BFF enjoying the new space.

Finishing touches: a few throw pillows and an extra square of fabric as hanging "art" for the wall.
Added in two terra cotta pots of bright colored petunias, and a planter with bright colored pinwheels. Old Little Tykes picnic table (in the background) got a make-over, too, thanks to a nice can of spray paint in Eden green. 
Last, but not least - a sign to personalize it. Spray painted an old board and then let Ruby do the rest! After watching the Little Rascals, she decided her clubhouse should say "No boys allowed!" But then she re-thought it and added in: "except Daddy".  Love it!
Wishing you all a fun summer! If you make your own, share it! Would love to see how yours turned out!