Saturday, December 21, 2013
Kids Make The Best Presents EVER!
Okay, so I am super excited to share with you my daughter Ruby's Christmas gift for my husband this year. While I helped her implement it, she came up with THE WHOLE IDEA HERSELF and it turned out so cute! She is besides herself with excitement. So proud of her! Her Daddy is gonna LOVE it!
So here is how the conversation went with my 6 year old after my hubs tucked her in one night:
Ruby: I love my Daddy. He's the best!
Me: Me too, Rubes.
Ruby: We should do something nice for him. (pause for thinking) and then...
I KNOW!
LIGHT BULB!!!!
Let's make him a great Christmas present! We'll make him a football field cause he like football and we'll take his picture and put HIM on it!
Me: What a great idea! We'll take his picture tomorrow!
Ruby: Okay, but mommy this is MY shoot so I get to be the boss this time, okay?
(LOL, the kid knows me so well. I am always setting up shoots around here.)
So, the next day she asked him to put on his Eagles jersey and told him how to pose while I took a few shots and then she took a couple herself. (To make sure they were just right). I had them blown up and let her choose her favorites. Here is how we made the craft:
1. First we cut a piece of cardboard into a rectangle.
2. Then we glued a piece of green construction paper on top of it - cut to the same size.
3. With a white crayon, she drew the lines of the field.
4. We didn't have any brown construction paper left so she drew (and colored in) a brown football
on white card stock and then cut it out.
5. Next, she cut out 3 Daddy "players"out of the pics.
6. We hot glued a nut onto a washer for the stands and use bamboo skewers (cut in half) to glue onto the back of each photo.
7. For the goal post, we broke yellow painted dowels into the right size (trimmed the ends with scissors) and glued together. I wasn't sure if they would hold so we backed it up with a little green wire wrapped around the corners.
8. We painted an empty thread spool and painted it red. (Ruby's idea. I pay no attention to football whatsoever, but she said it should be red so red it was!)
9. After it dried, we filled all of our "stands" with hot glue and put our photo-Daddy's and the goal post in them.
10. Last, we hot glued the goal post to the field. We left the "players" free standing so they could be moved for play.
I love how it turned out. So much, in fact, I'm thinking it would be super cute for a family gift sometime with a few men in the family "playing" each other on the field! I'm also thinking that maybe I could use a magnet between the layers of cardboard and green paper so that the players would be stuck there, but not permanently. So many fun options! Hope you enjoyed this craft!
Close up of the 3 Daddy pics she chose. I absolutely love the silly face he's making on the 2nd one.
Wishing you and yours a super fun holiday!!
Jen
Monday, November 25, 2013
I HEART MY CUSTOMERS!
I can't believe it's been so long since my last post! It's been a fun and busy time gearing up for all the fall and winter holidays! I'll do a few recaps after Thanksgiving, but for now I thought I'd show you a cute little centerpiece a customer recently made with my pom wands for a panda themed baby shower.
So cute! Great job, Necie, it's adorable! Thanks for sharing!
*Mini pom wands available in any color combo at:
PRETTI MINI PARTY GOODS
www.etsy.com/shop/prettimini
Thursday, October 31, 2013
Halloween Flamingo Costume DIY
There is particular catalog that comes in the mail with the best costumes ever. However, they come at a hefty price tag. Still, I let my daughter take a look, thinking I could make her something in a similar style if she sees something she likes. LOL, of COURSE she picked out the flamingo! I kinda chuckled at my bird lover and then got to work. I wasn't sure how on earth I was going to make it, but the look of excitement on her face made me determined to make it something really pretty.
Found out it wasn't so tricky at all. I made a fun, no-sew costume with things she had in her wardrobe, a whole lot of pink tulle, and a whole lot of feathers. Here's how to do it...
WHAT YOU NEED:
Hot pink turtleneck
Hot pink leggings, jeans, or tights
Hot pink boots or shoes
1- hot pink play dress with tulle bottom (from Halo Heaven)
2 feather fans (bought mine at Oriental Trading Co.)
A whole lot of hot pink tulle (Joanne Fabrics)
1 piece of Hot pink elastic (Joanne Fabrics)
3-6 thin boas.
Feather clips
Feather hair piece
Mask (optional)
The first few items on the list are layering pieces. I put them on my daughter and then built upon that to make the rest of the costume.
With the hot pink elastic, I made a waistband for a tutu. Wrap around your daughter's waist and measure to the proper width. Then hand or machine sew then ends together to make a circular waist band. (Oops! I said this was no-sew, didn't I? Well, the REST of it is, I promise!)
Next cut strips of hot pink tulle. Length depends on your child's hight. For my 6 year old I measured it up against one of her skirts then made it twice as long. You want to be able to fold it evenly over the elastic and then tie in a not - leaving 2 even pieces handing. Make a point at the bottom of both pieces of the tulle. Keep tying all the way around and then cut strips a little bit longer for the next layer to go on top. Add a 3rd layer a little longer. You can always trim later, but having some shorter layers underneath creates the round poof I was looking for to make it more bird-like. You can also tie in a few strips of hot pink glitter tulle in at the end, putting them every so often or like 4 strips across the front, 3-4" apart.
Take your boas next and cut them in half. I tied a few on to the sides and then used the rest to make a poof of "tail feathers" in the back. Attach it to a piece of tulle to tie around the waist like a belt. Weave it through the fan to add that piece to the back also.
Last we added clip on feathers I found at Michael's onto the collar of her dress and onto each sleeve.
Add a mask if you'd like. You could make one of these or buy at Michaels.
Easy peasy and pink-tacular!
Add a pink pumpkin and you are ready to go!
HAPPY HALLOWEEN!
Tuesday, September 24, 2013
I HEART MY CUSTOMERS: Celebrating ALL of YOU!
We hit some milestones over here lately and I am feeling oh so grateful! Sales at Pretti Mini Party Goods doubled this month! So many more of you are finding my Etsy shop and making the shop or a particular good(s) a favorite! THANK YOU!
We also hit a big milestone on our Face Book page: Over 1000 LIKES!!! I think we are currently at 1044! In honor of that number, we did a drawing and are giving away a sweet pink tutu set. IRMA FLORES you are the winner! Please PM me your address and congratulations!
To all of you who stop by the blog or shop for ideas...for all of you that "like" this momma's creative stuff...and for all of your orders and support
THANK YOU SO MUCH!
Monday, September 16, 2013
The Glama Pajama & Pancake Party!
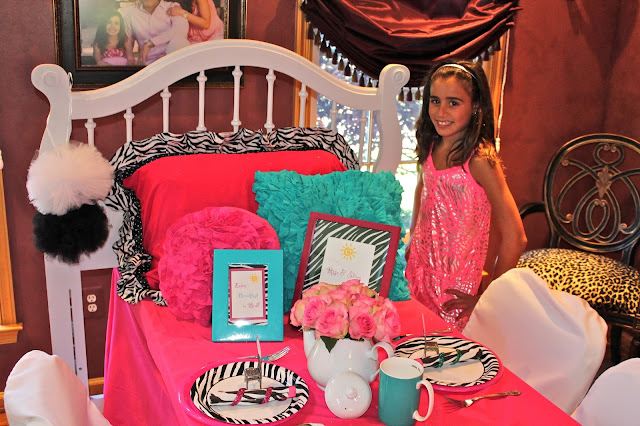
I had the great pleasure of doing my 2nd party for this family on Saturday. Grace, her husband, Steve, and their sweet daughter, Ella, are about the nicest people you could hope to meet. I just love working with Grace! She's fun and creative and brings great ideas to the table. For example, I had already done a "Glama Pajama Party" with the bed table. But instead of having 15 girls sleep over, she thought it'd be fun to do a pajama and pancake theme during the day and have the kids come in their PJ's! Such a great idea! So we merged the two ideas and it became one super fun Pajama's & Pancake party.
The table was much longer than how I did it in the past. I love how it looks adding an extra table. It ended up being 15 ft long! I had to take TWO pics to be able to show you the whole thing!
The table was much longer than how I did it in the past. I love how it looks adding an extra table. It ended up being 15 ft long! I had to take TWO pics to be able to show you the whole thing!
To set the mood, we had happy little signs up everywhere with morning-type phrases.
My fav was this awesome mirror decal Grace found. (Will find out where she got it and post later!)
Isn't that perfect?
In the kitchen, we set up a breakfast buffet.
Pancakes: The main attraction.
Adorable "eggs and sausage" treats made by Grace.
The fixin's bar had lots of fun toppings for our pancakes.
Sprinkles-a-plenty!
One fun breakfast.
Next, it was time to get crafty. I sewed ribbon on some plain white pillow cases and gave the girls fabric markers and stencils. They turned out really cute.
In the family room we set up a large vanity for hair and make-up.
Braiding is the hottest new thing, so the girls got to choose one of nine braided looks. Jasmine - of Jazzy Style To Go - did an amazing job! They all looked so glam! Wish I had taken more pics of the hairstyles to show you!
Here are a few more misc party pics...
Milk served in my favorite milk bottles with paper straws.
Adorable " glam shoe" cupcakes by Kelly Ott of Cannon Classic Cupcakes & Cakes
Gift bags
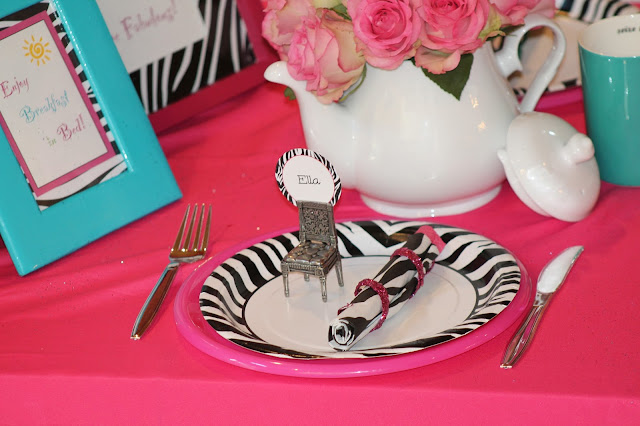
Place setting
And last - but not least - I leave you with these gorgeous smiling faces...
HAPPY BIRTHDAY, ELLA!
Thank you, Grace and family for letting me be a part of your special day!
Credits:
Party Styling: Jen Kitzmiller of Plan Me A Party
Hair & Make up: Jasmine of Jazzy Styles To Go
Cupcakes: Kelly Ott of Cannon Classic Cupcakes & Cakes
Paper Goods & Poms: Pretti Mini Party Goods
Thursday, September 12, 2013
I HEART MY CUSTOMERS: Double The Sweetness Pink Ombre Party
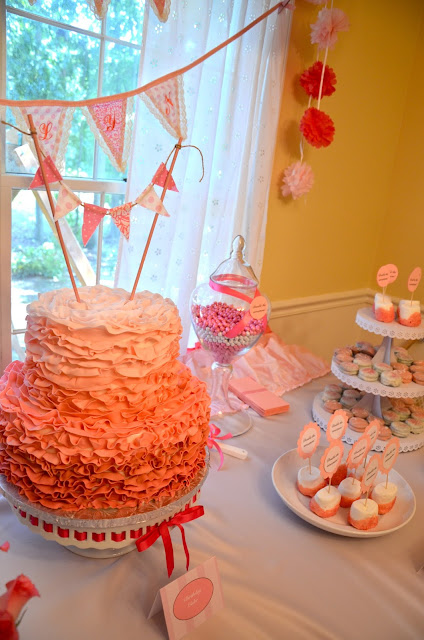
When a lovely FB friend told me she was doing a pink ombre party for her twins, I was super excited to help! Talented mom, April, did an amazing job with this party! No detail was left undone and the pinkness of it all is just PERFECT! I made the bunting (name banners), cake bunting, cupcake toppers (used on the sugar-dipped marshmallows), and the buffet cards. But the design and delicious sweets were all April's doing! Just LOVE this sweets table... and did I mention that cake? Take a closer look!
LOVE the ruffle cake!
Buffet cards
And Double the Sweetness picks for the sweetest twin girls!
A beautiful job, April! Thanks so much for sharing your pics with us!
Sunday, September 8, 2013
A Few Of My Favorites From The Shop

So excited today putting together my first print ad for Pretti Mini (my Etsy shop)! What do you think?
www.etsy.com/shop/prettimini
Friday, August 30, 2013
I HEART MY CUSTOMERS: Teddy Bear Tea Party!
Could this set up be any cuter? This week's thank you goes to Jennifer Jayne Photography for the absolutely gorgeous, TO-DIE-FOR photos she took using my pink and cream backdrop and Teddy Bear dress and to PROP INSANITY for the awesome feature on your blog! Thank you SO much! Love these folks and was so happy to work with them. Just look at these stunning photos...
Oh my goodness, this baby is so precious!
Love the crate and natural wood, and this girl is just darling. So happy to have these photos! But my favorite shot might be this one below. Too beautiful for words.
Thanks, Jennifer, for your beautiful work and thank you Prop Insanity for the wonderful site and inspiration your offer us all!
Subscribe to:
Comments (Atom)


